Pronterface is a graphical interface for the host software supplied with your printer. It is part of a set of software from Printrun� a group of G-code utility applications. It is with Pronterface that you can control your 3D printer. This guide assumes you already have all the required software installed. If you do not already have the required software installed, please visit our guide on how to install it.
Connecting to your printer
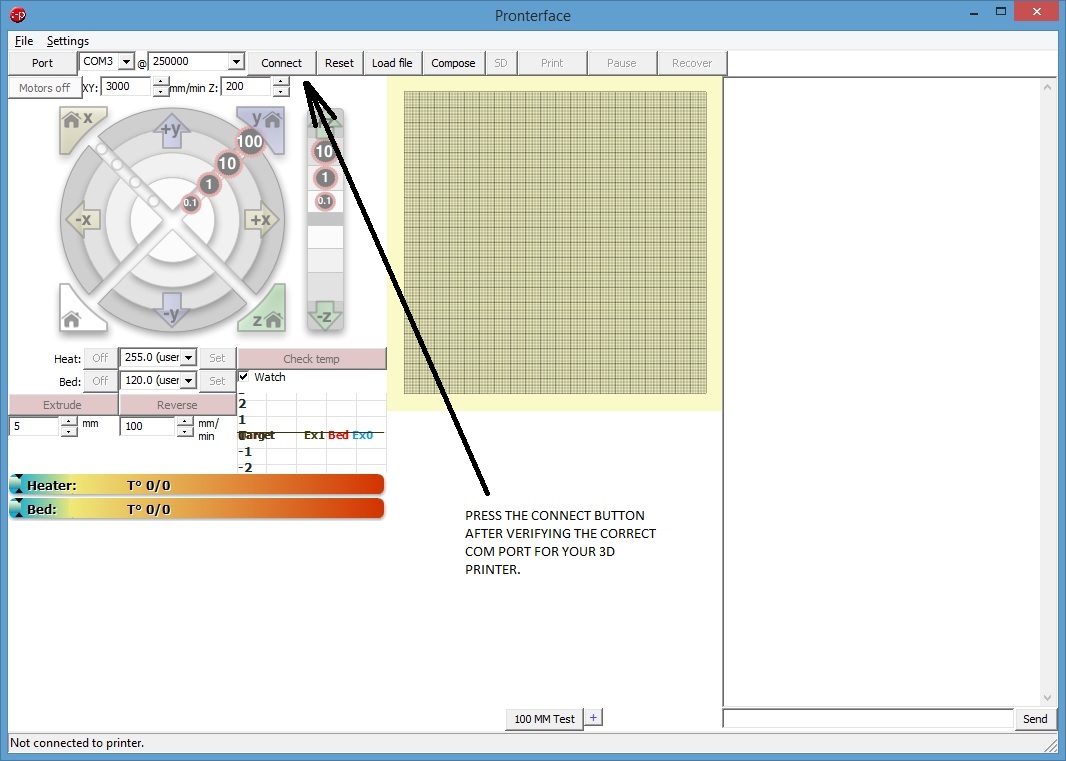
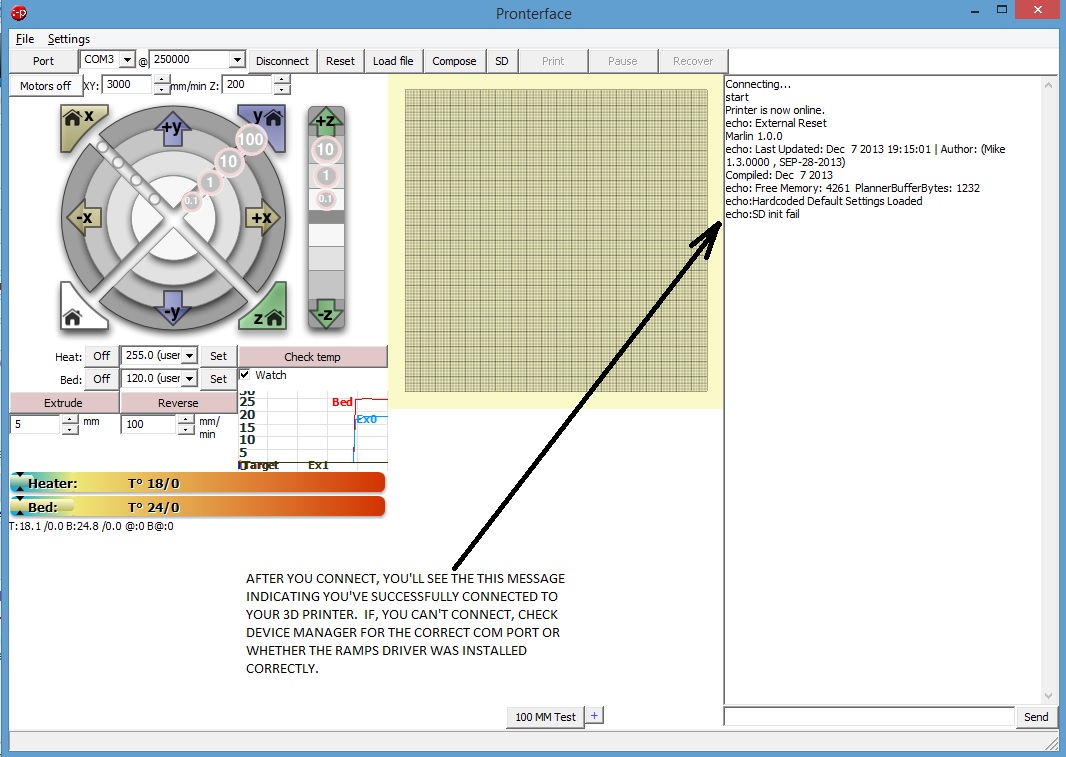
Start by connecting your 3D printer to you computer via a USB cable. Connect the provided power supply to the 3D printer and plug the power supply into a power outlet. Next open Pronterface by navigating to the directory you have installed Pronterface in (i.e. C:\Pronterface ) and double click on the Pronterface.exe icon. After Pronterface loads select the com port your 3D printer is connected to and then set the baud rate to 250000. Next click on the connect button. You will see a message in the right column of Pronterface indicating that the printer has successfully connected .
Homing and Moving the X, Y and Z Axis and the Extruder
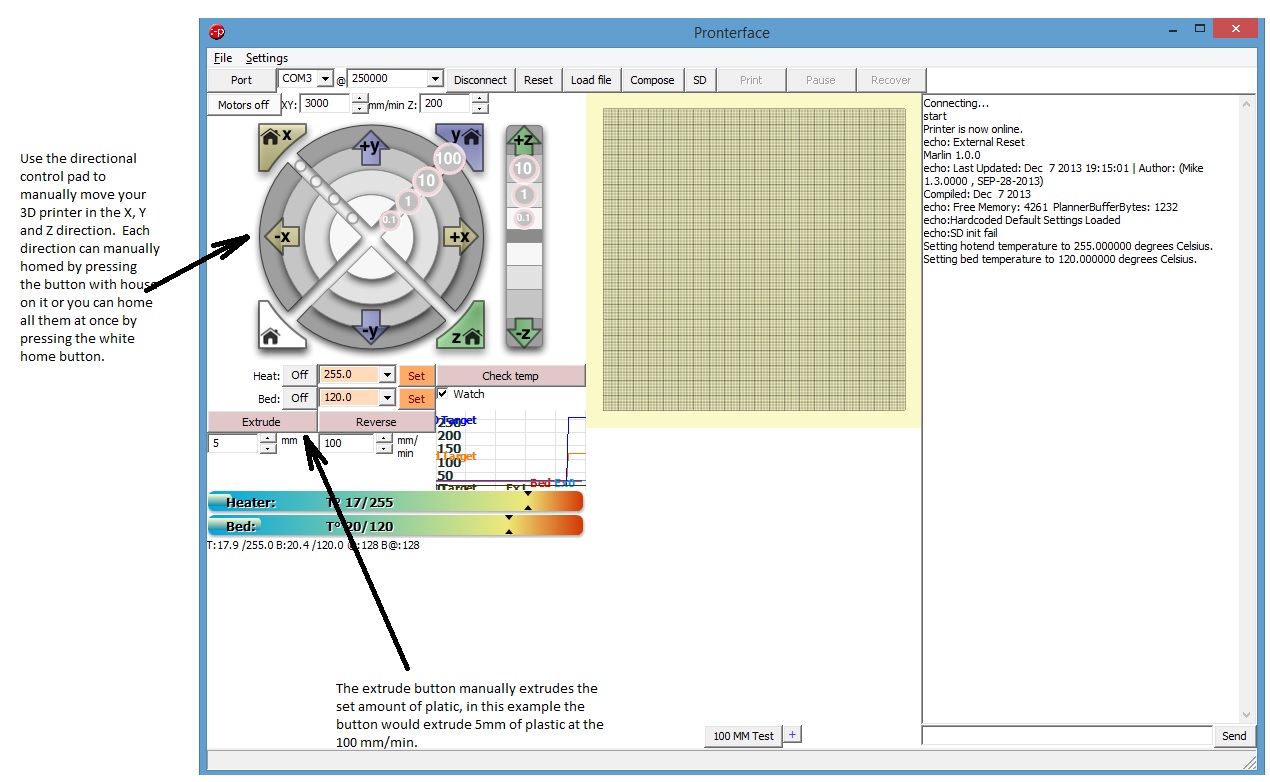
Once connected you can use Pronterface to manually control the X, Y, and Z axis plus the extruder. Before manually moving an axis, you may want to home the axis before hand to prevent the axis from over shooting its boundary. After the axis is homed it will not be able to travel past its maximum set limit of 204mm. To home an axis (moving the axis to its zero start position), press the X-home, Y-home, or Z-home icon to home the X, Y, or Z axis respectively. When a print is started (if you use the provided software and the predefined parameters to slice the model) the printer will automatically home each axis so it is not necessary to home the axis' before printing.
After homing you may move any axis, X, Y, or Z by pressing the X+, X-, Y+, Y-, or Z+, Z- directional icons. The X and Y directions have 4 distances to choose from to move at a time�.1mm, 1mm, 10mm, or 100mm in either the plus or negative direction. The Z axis directions has 3 distances to choose from�.1mm, 1mm, and 10mm. When an axis is at its home position it is at zero. You can move each axis of your Asterid printer 204mm from the home position. Starting from zero press the icon in the positive direction. To move towards the home position move in the negative direction. You can also change the rate at which the X, Y and Z axis move by entering a value in the XY mm/min dialog box and the Z mm/min dialog box, however, we recommend using the default values of 2000 mm/min for the X and Y axis and 200 for the Z axis.
You can also manually control the extruder motor using Pronterface, but be sure that heater is turned on before doing so, see the instructions below for more information. The distance and speed of the manual control is set right below the extrude button. The default values are 5mm at 100mm/min.
Nozzle and Heated bed settings
Underneath the directional controls for moving an axis are the nozzle heater and heated bed controls.
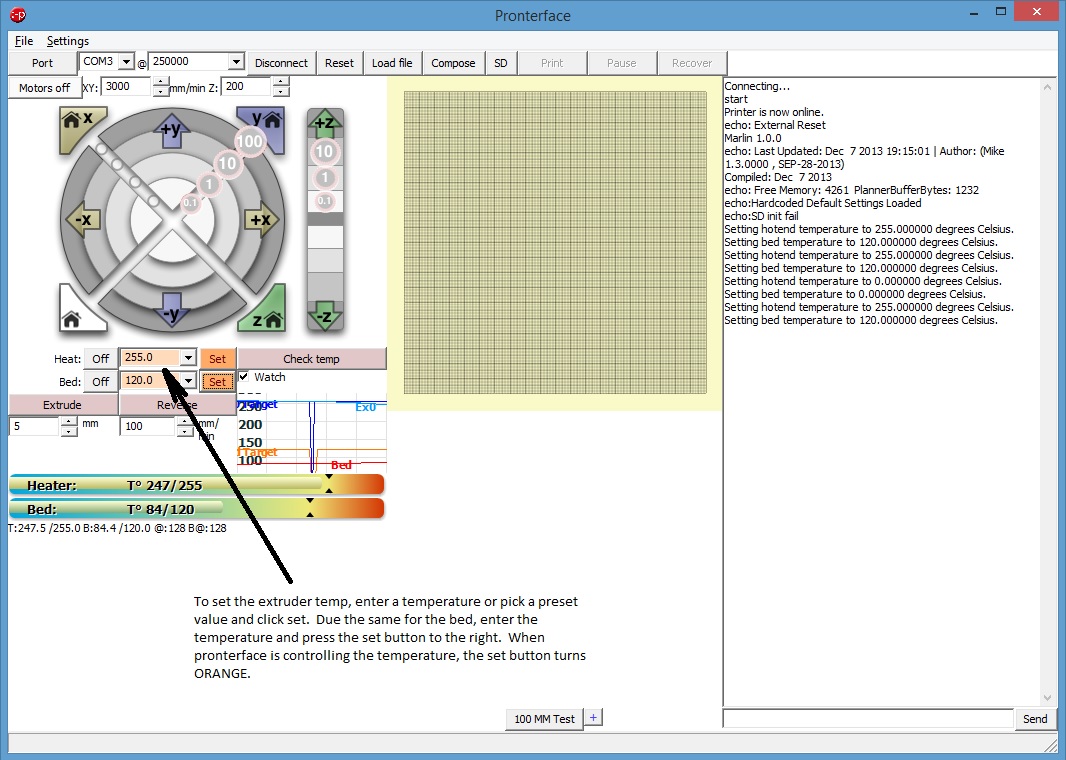
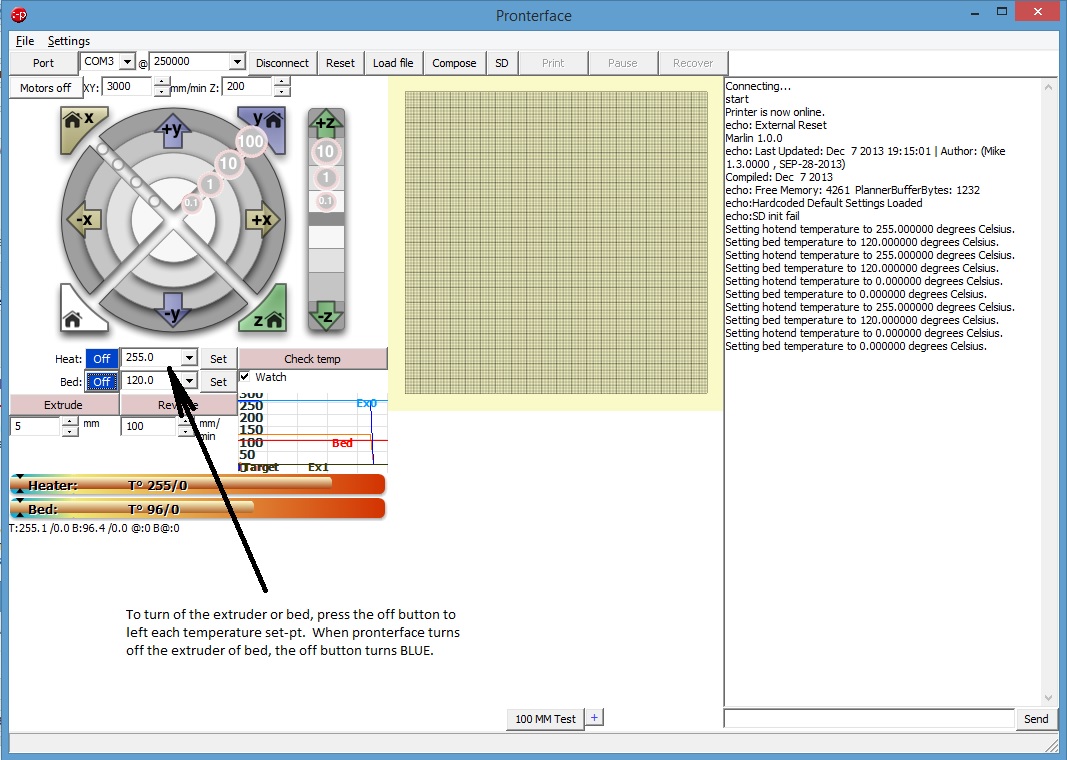
To set the temperature of the nozzle use the pull down menu following Heater:, to select a predefined temperature or enter a temperature manually and press Set. To turn the nozzle heater off, press the Off button next to Heater:.
To set the temperature of the heated bed (if you model of printer has a heated bed) use the pull down menu following Bed:, to select a predefined temperature or enter a temperature manually and press Set. To turn the heated bed off, press the Off button next to Bed:.
You can monitor the temperature of the nozzle and bed by selecting the Watch option and then viewing the graph of real time temperature value. Or, you can press the Check Temp to view the actual temperature in the console on the right of Proterface.
Opening Slic3r from Pronterface
From the pull down menu in the toolbar select Settings then choose Slicing options. This will open the program Slic3r. Click here for a tutorial on using Slic3r for more information.
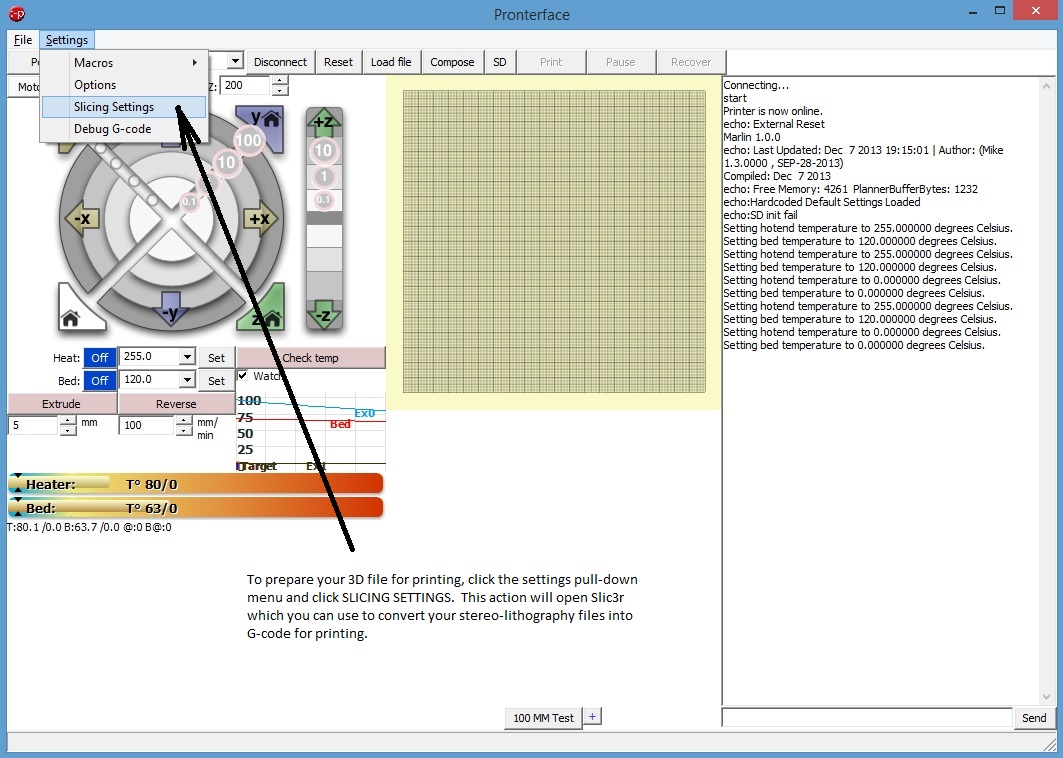
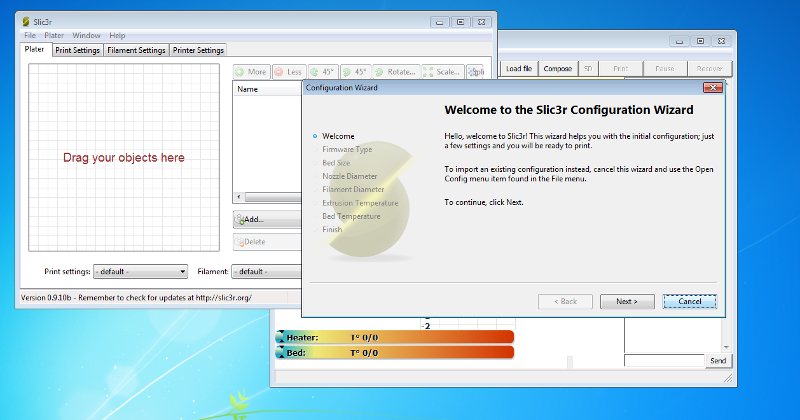
If this is your first time opening Slic3r then you will be prompted with the Slic3r configuration wizard. Select cancel on this wizard and Slic3r will now load the 3 pre-configured profiles for your Asterid Series 3D printer.
Opening a file to print
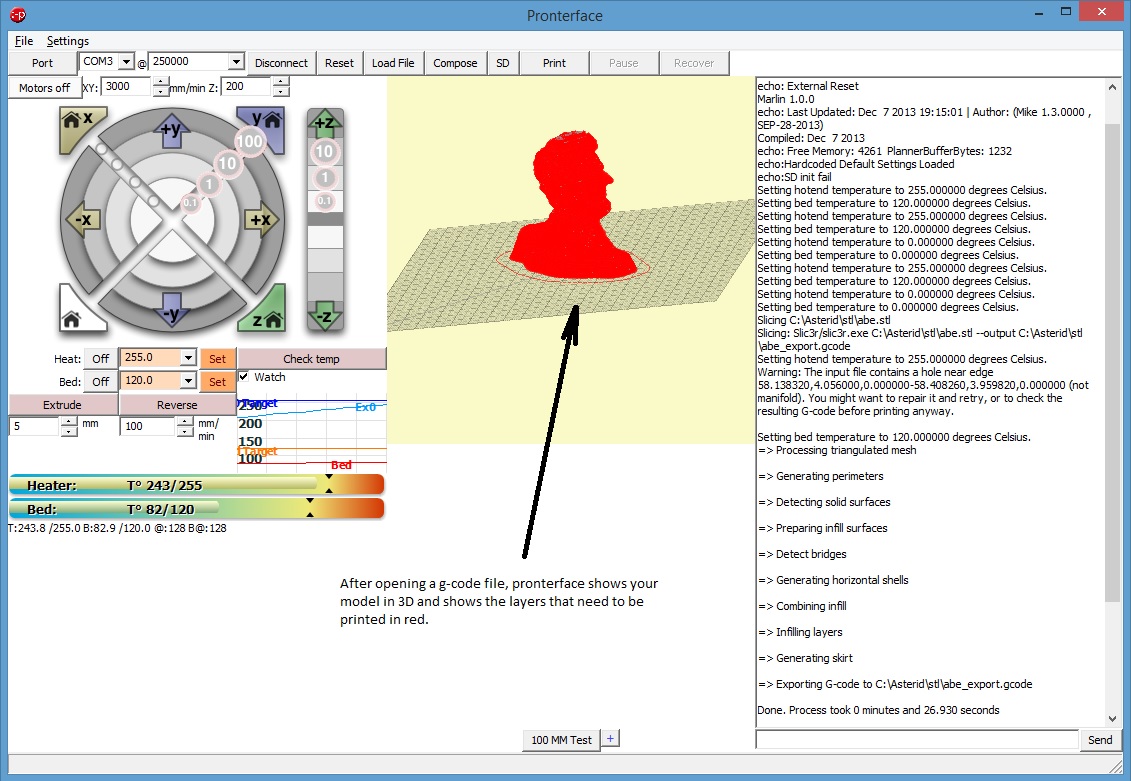
Your Asterid 3D printer uses G-code to know what to print. The slicing program will convert a stereolithography (.STL) file of a 3D model into the necessary G-code that your printer can understand. Once the file has been exported into the needed g-code format you can open that file in Pronterface for printing. For more information and instructions on how to slice please visit our Getting Started with Slic3r article for more information.
To open the G-code, navigate to the pull down menu on the Pronterface toolbar and select File, open... Navigate to the folder you exported the G-code file into and select that file and then press OK.
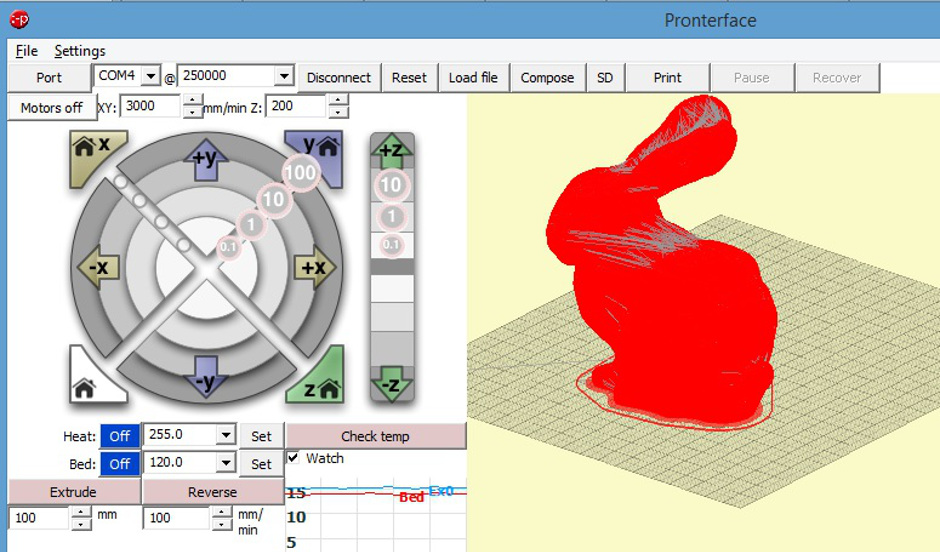
When Pronterface loads the file it will appear on the graph in the graphical user interface.