Asterid 3D printer software CD installation
STEP 1
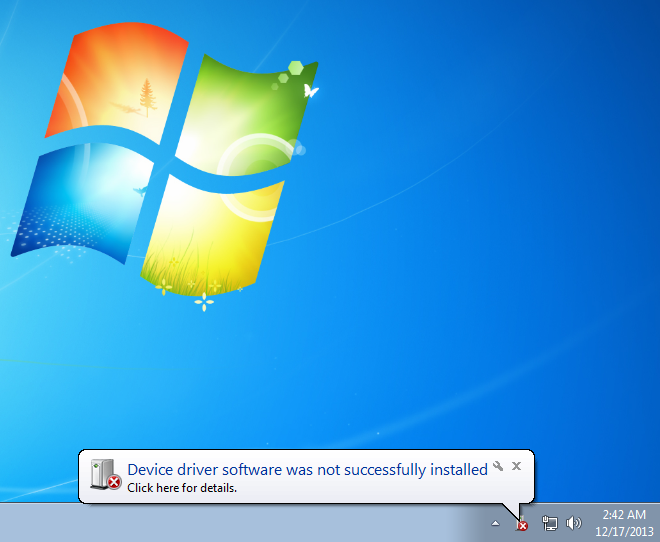
After inserting the supplied CD and connecting your Asterid 3D printer, you see the following message about the device driver, "Device driver software not successfully installed". Just ignore this message or click the X button to close the message. The installation of the Arduino software package will install the device driver and remove this message.
STEP 2
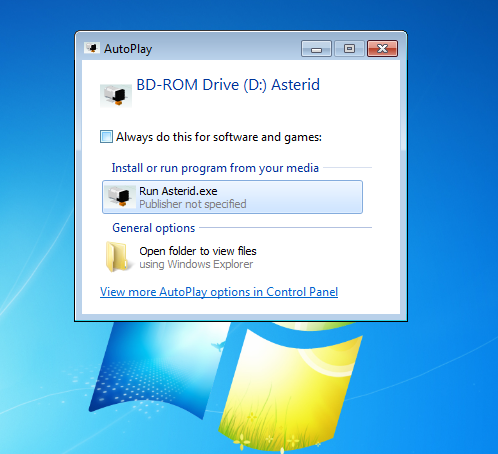
After inserting your software CD, autoplay will be bring up the following message box. Click "Open folder to view files". If this message doesn't appear when inserting the CD, just browse to your COMPUTER in the start menu and open up your CD drive.
STEP 3
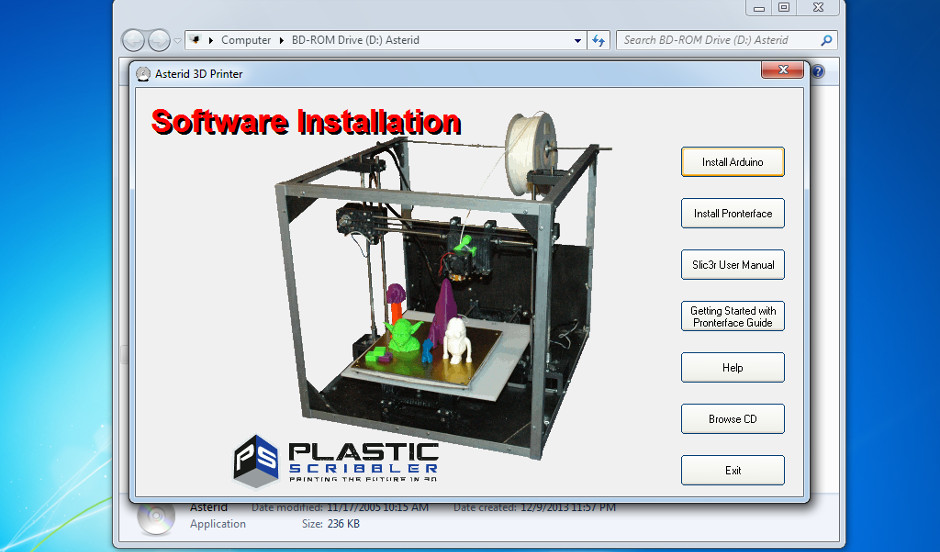
You should now have the contents of the CD shown in windows and it should like similar to the below screenshot. The next step will run the Asterid application file using Administrator rights.
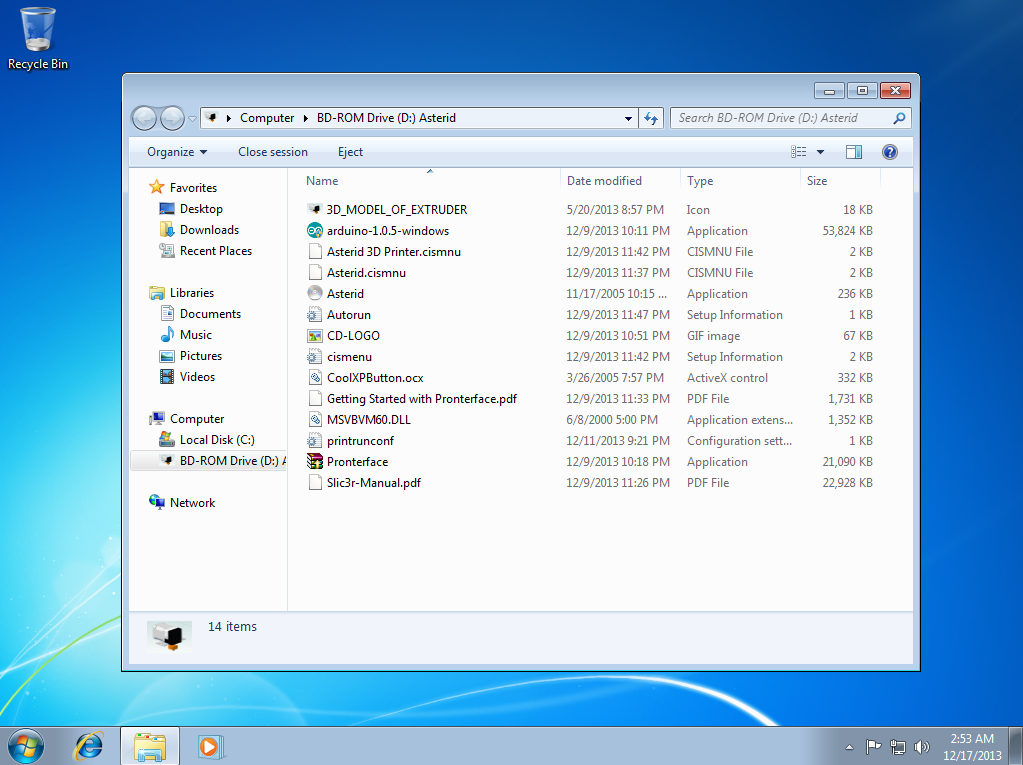
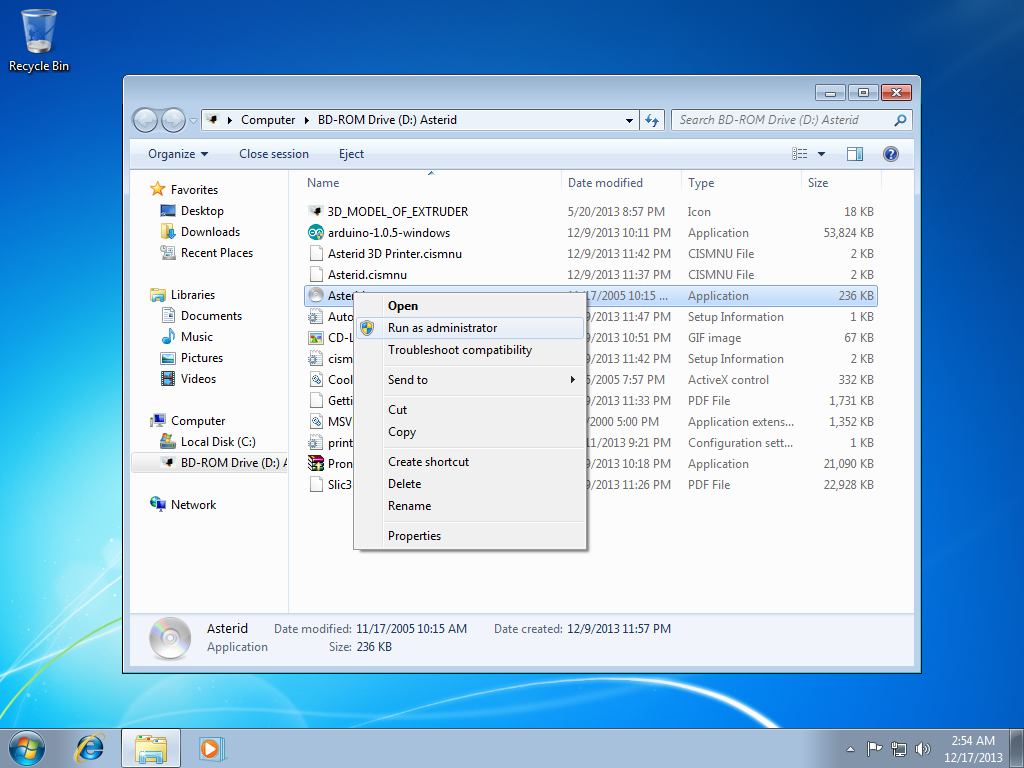
STEP 4
RIGHT click on the Asterid application file and click Run as administrator.
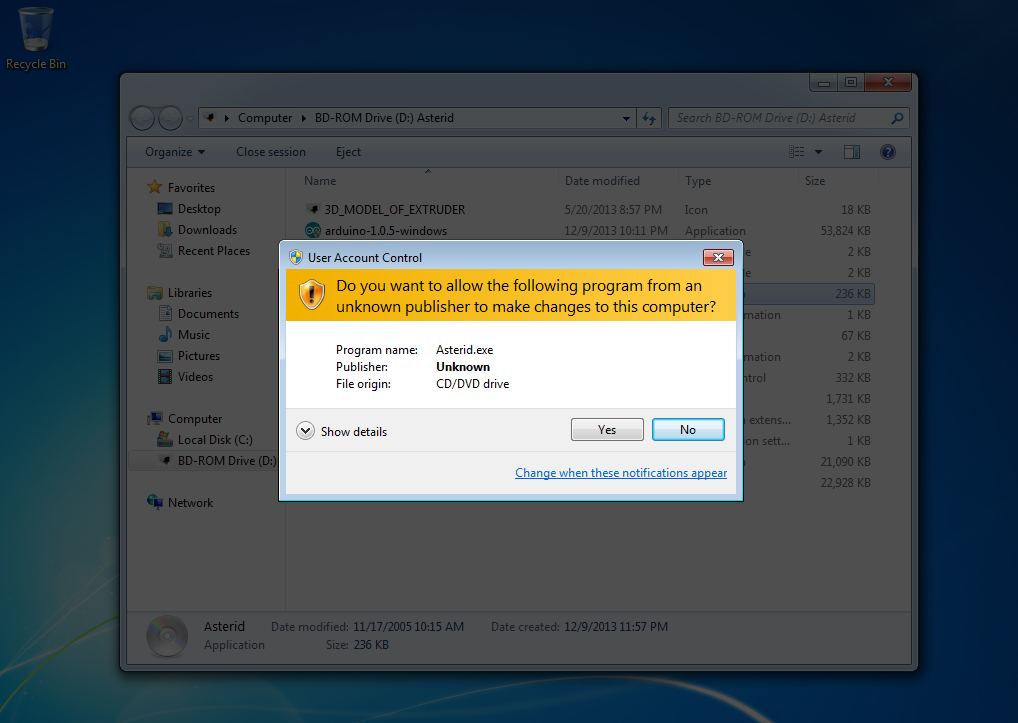
STEP 5
The User Account Control window will appear, click the YES button to continue.
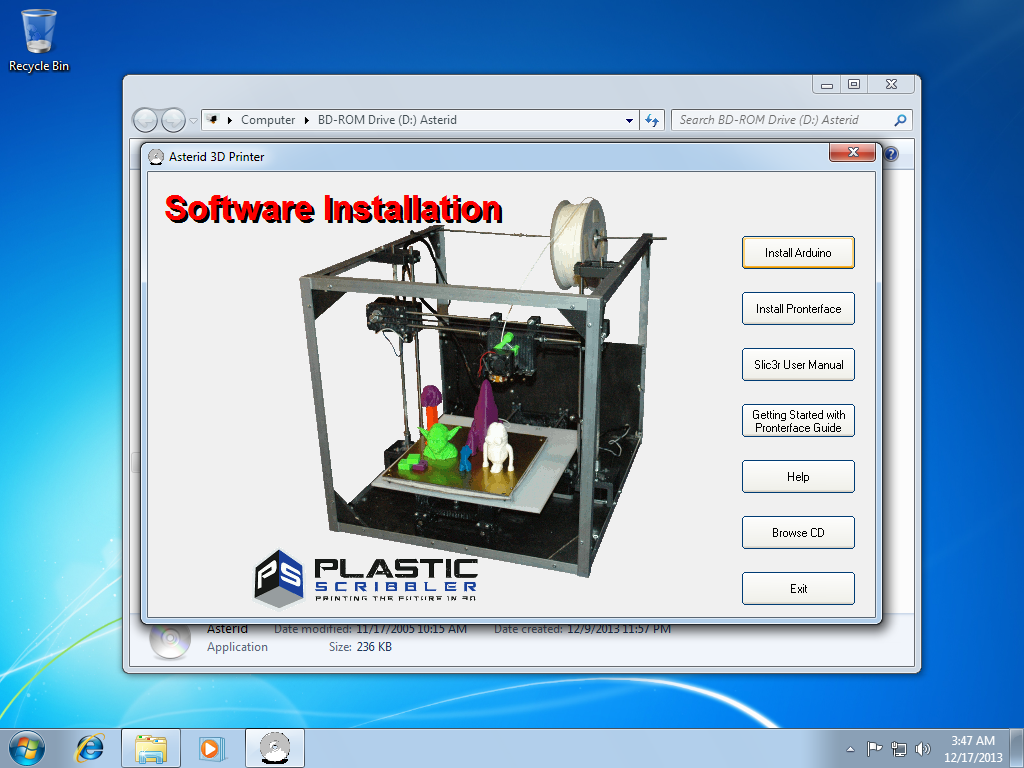
STEP 6
Click the Install Arduino button to continue.
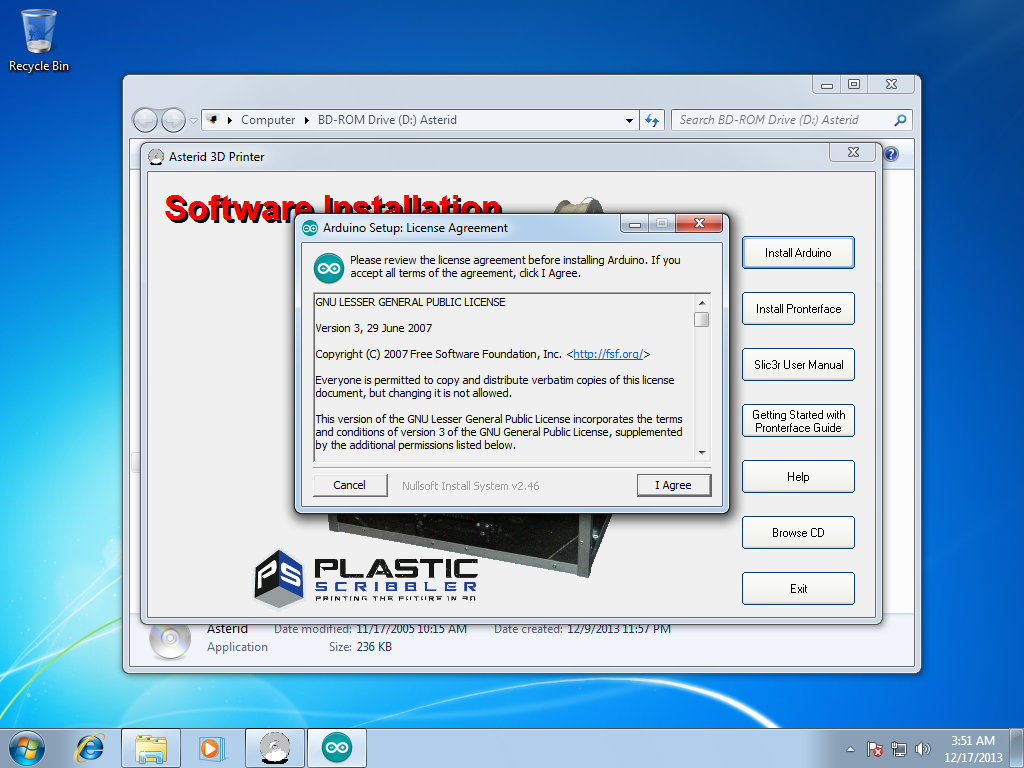
STEP 7
Click the I AGREE button.
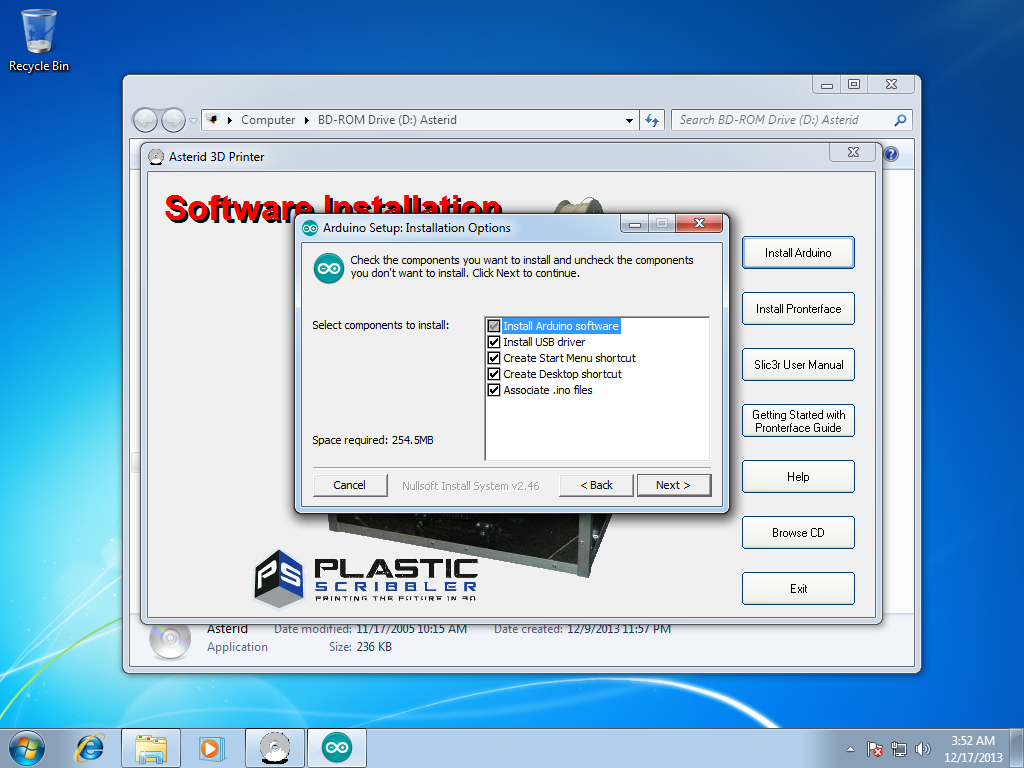
STEP 8
Click the NEXT button.
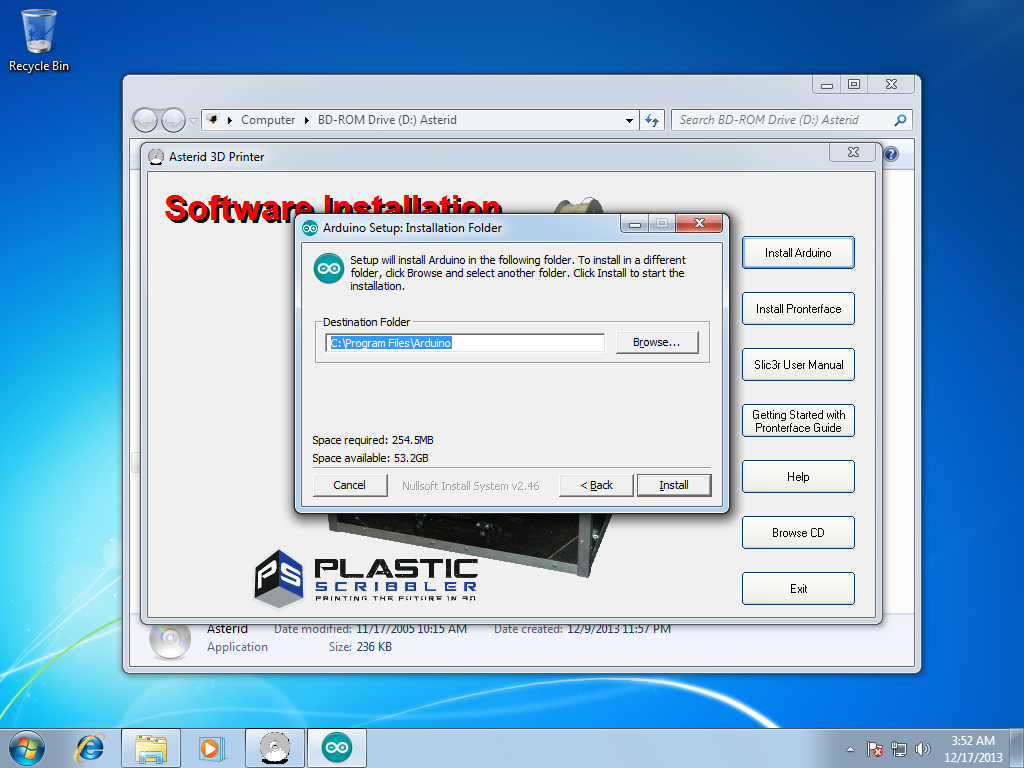
STEP 9
Click the INSTALL button and the Arduino software will begin installing.
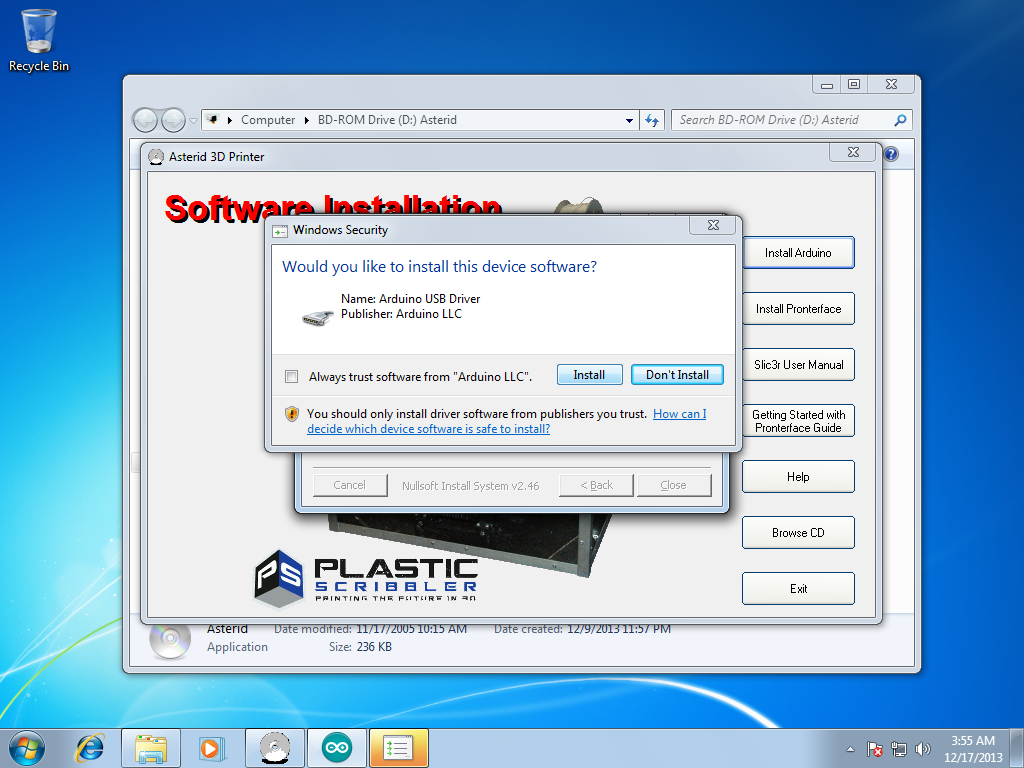
STEP 10
During the Arduino software installation, a Windows Security window will pop up, click the INSTALL button to install the device driver for your 3D printer controller.
STEP 11
Click the CLOSE button when the Arduino software installation is complete.

STEP 12
You'll now be back at the Asterid 3D printer installation CD application window, click the INSTALL PRONTERFACE button.
STEP 13
The install pronterface button brings up a WinRAR extraction window. You need to change the destination folder to match your hardware.
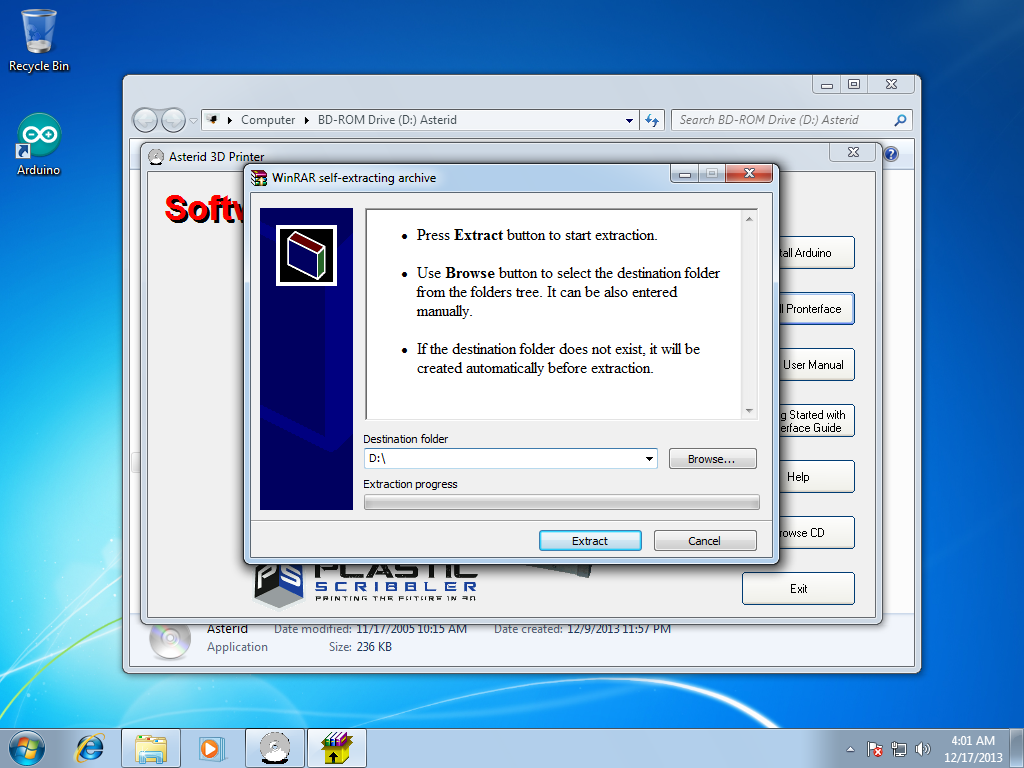
STEP 14
Fill in your hard drive as the destination folder, on my computer it is C:\ However, if your hard drive is assigned a different drive letter, please use the appropriate drive letter. Now click the EXTRACT button.

STEP 15
You'll now be back at the Asterid 3D printer installation CD application window, click the BROWSE CD button.
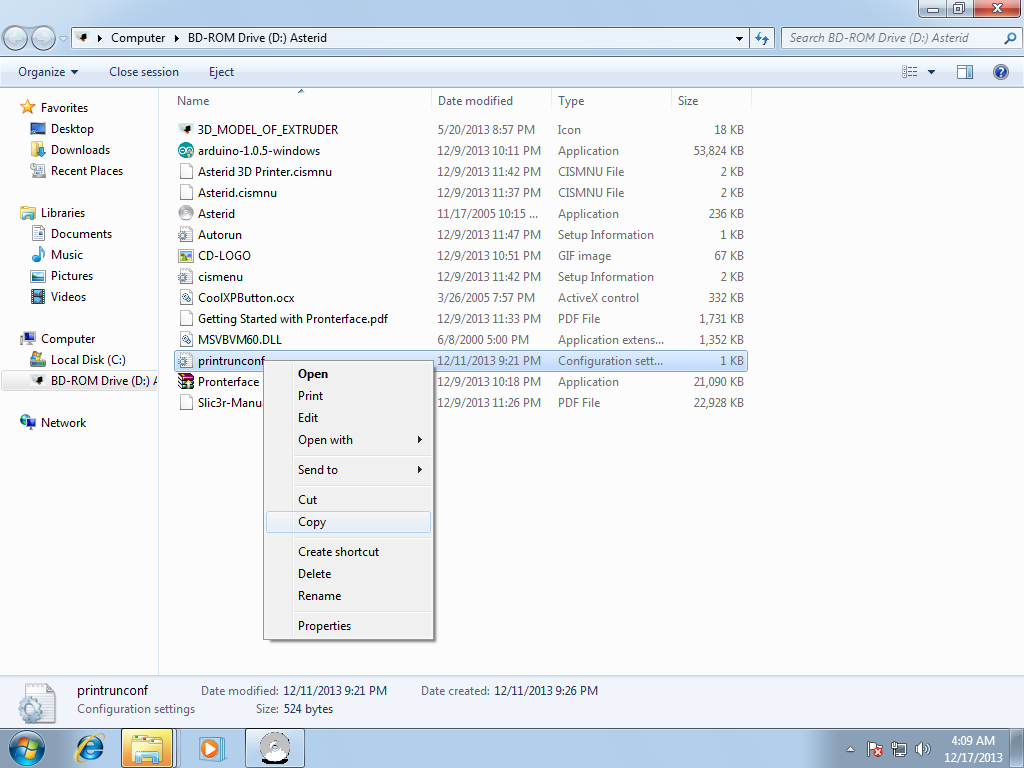
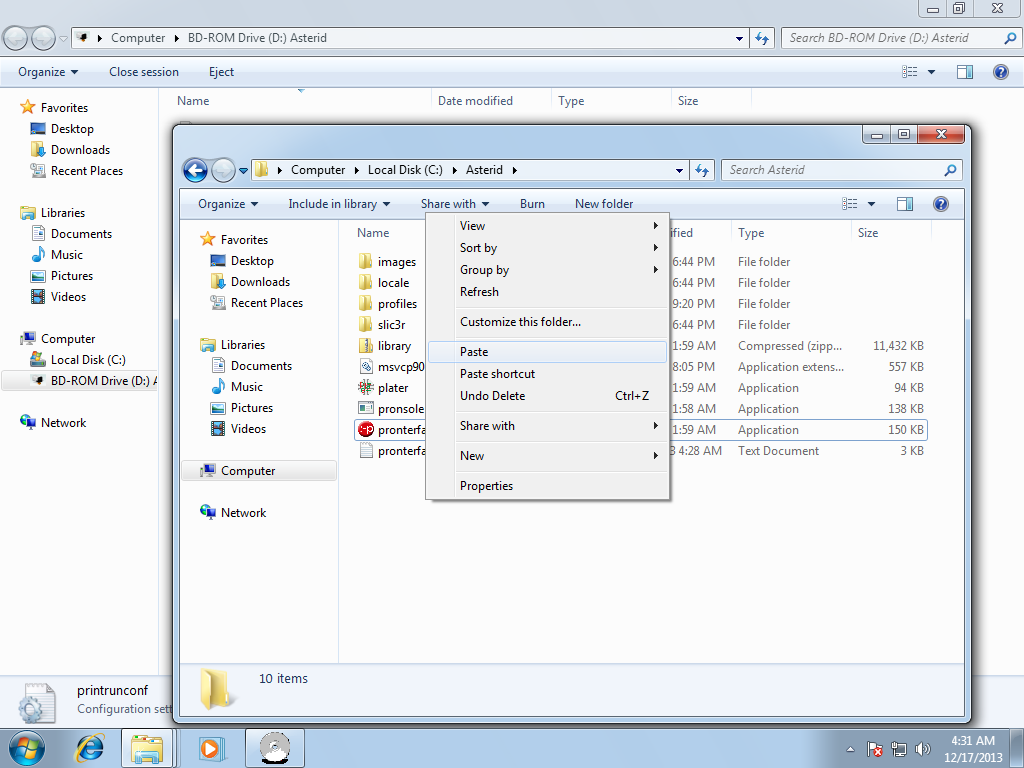
STEP 16
Right click on the printrunconf file and click COPY.
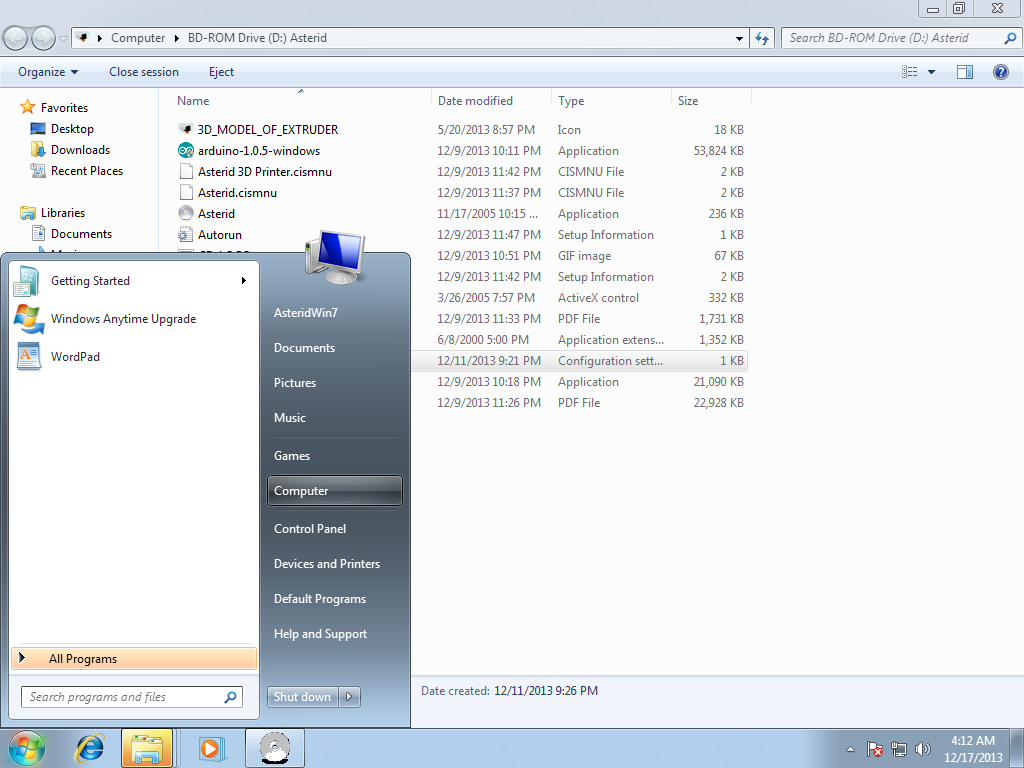
STEP 17
Click the start menu and click COMPUTER to browse your computer's files.
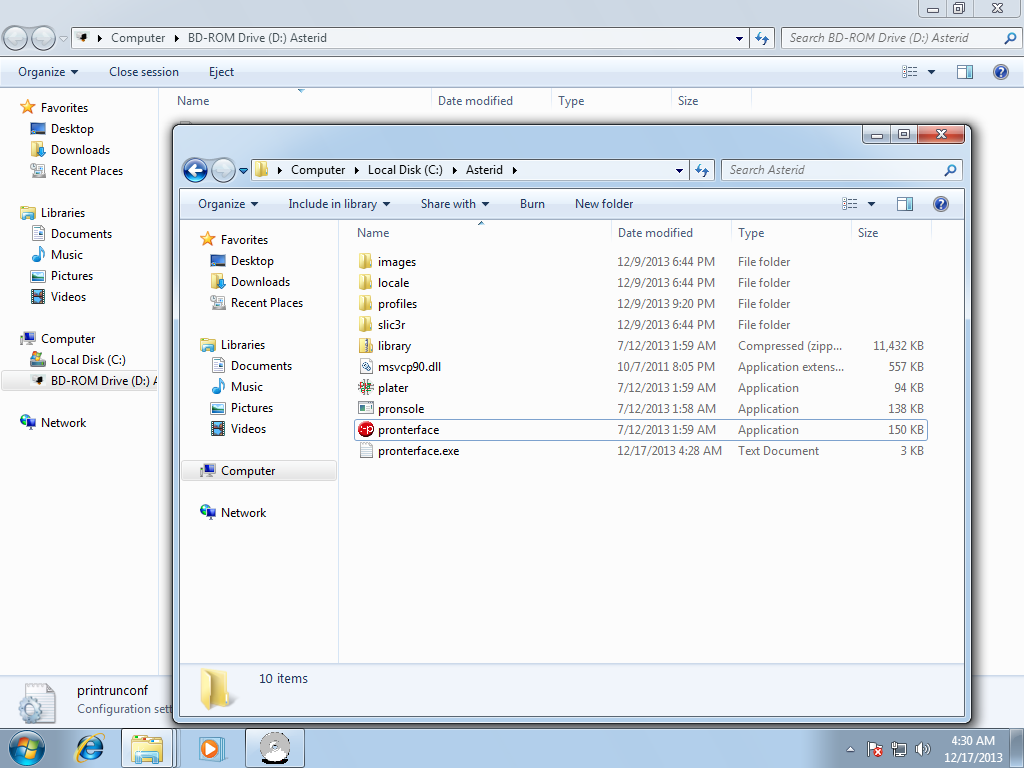
STEP 18
Open up your hard drive and open the Asterid folder in the root directory as shown below:
STEP 19
Copy and paste the pronterfaceconf file from the CD to C:\asterid\ folder.
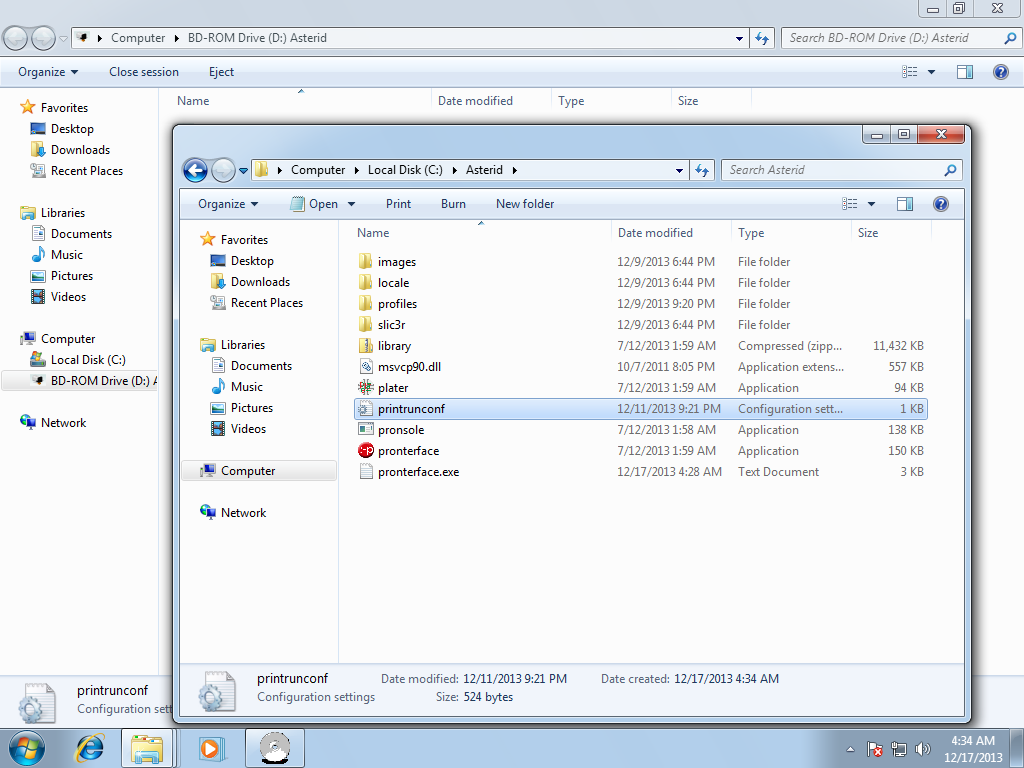
STEP 20
Verify that the printrunconf file has been copied into the c:\Asterid\ folder on your hard drive.
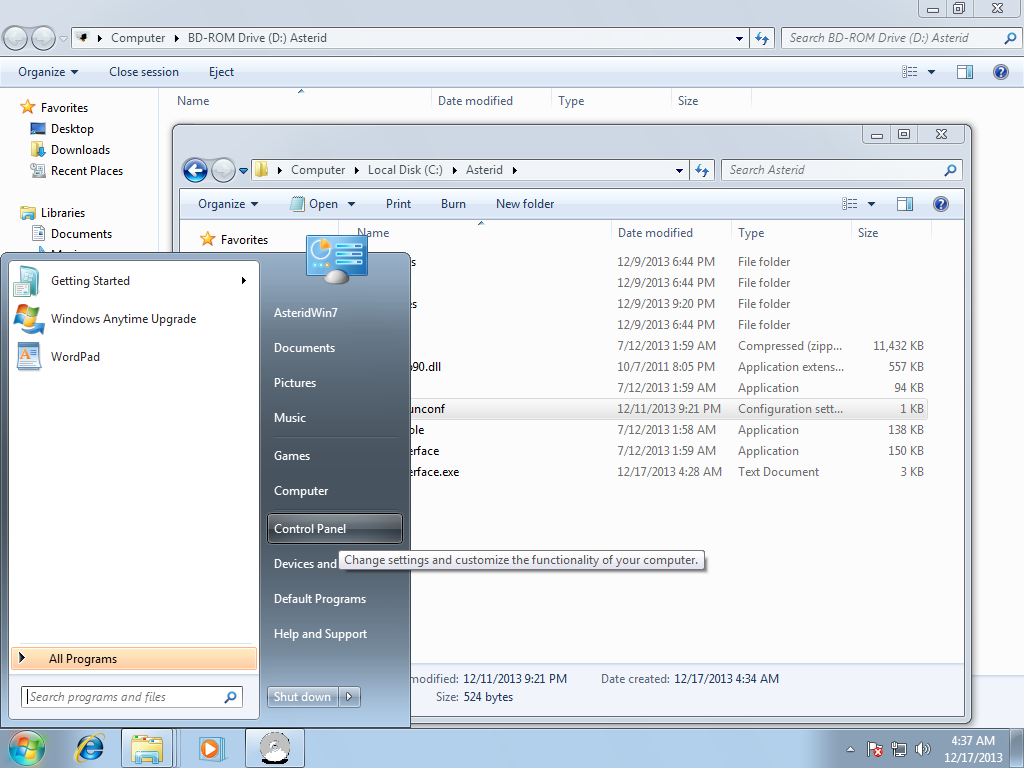
STEP 21
We just need to set your 3D printer COM port speed and check the COM port number and your 3D printer should be installed and working. Click the start menu and click the CONTROL PANEL icon.\
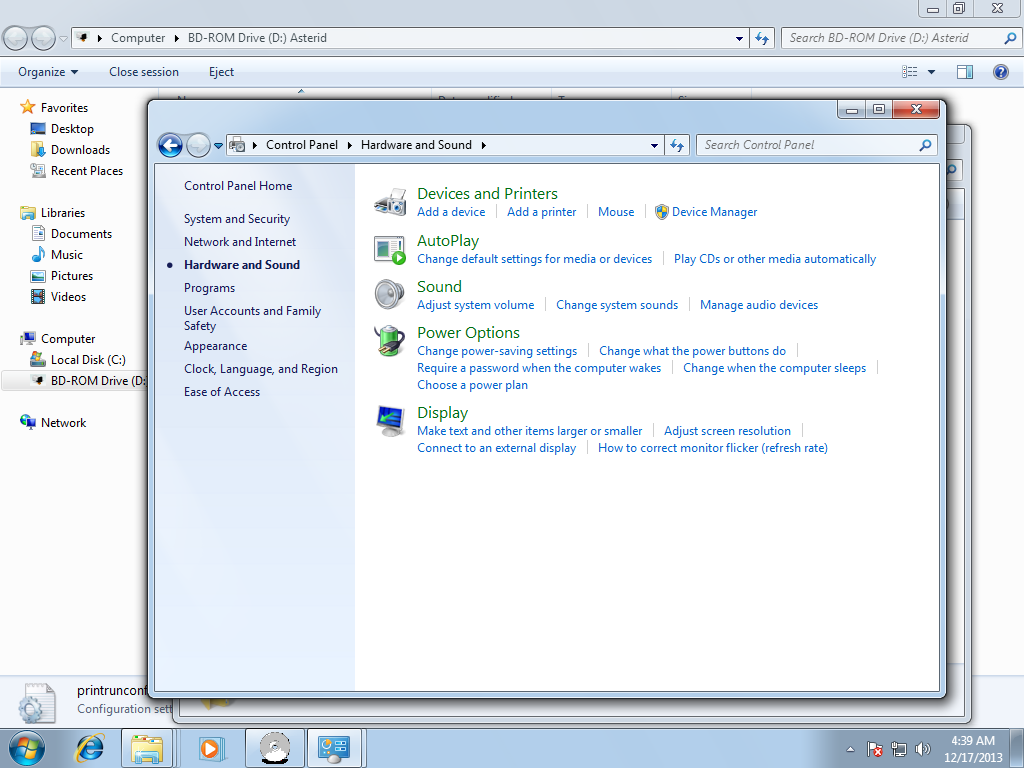
STEP 22
Right HARDWARE AND SOUND in the control panel window.
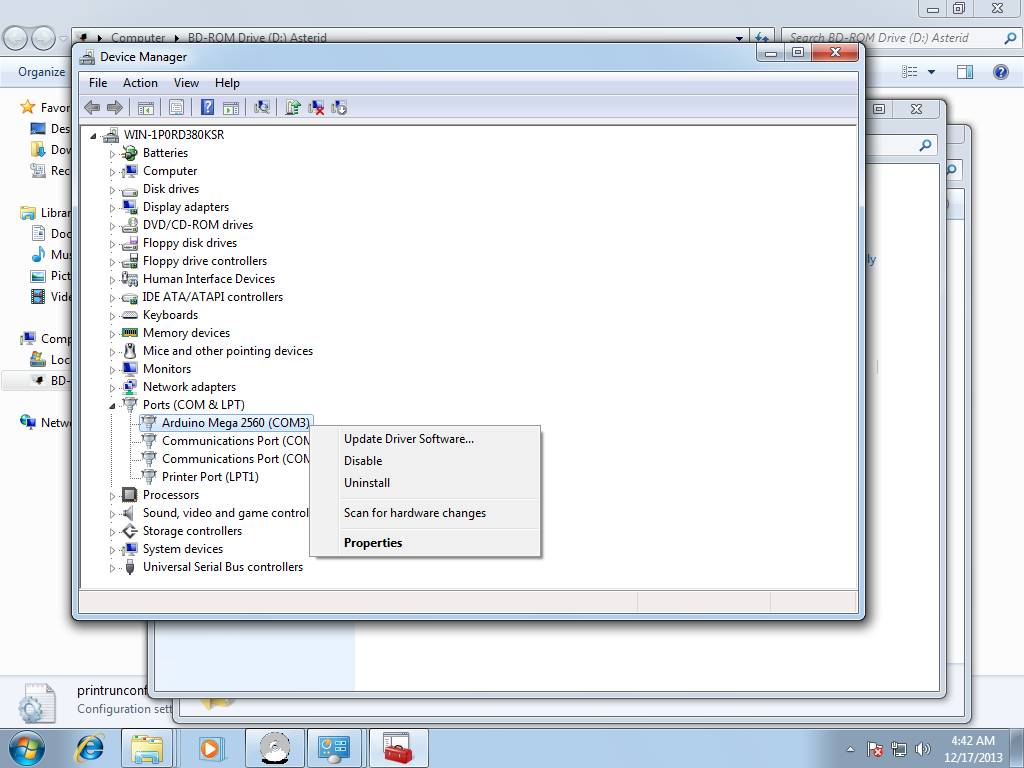
STEP 23
Click the DEVICE MANAGER link to open device manager and browse to your PORTS. Note your 3D printer COM port, in my case its COM3 but it could be a different COM port number on your computer. Right click on the Arduino Mega 2560 COM port and click PROPERTIES.
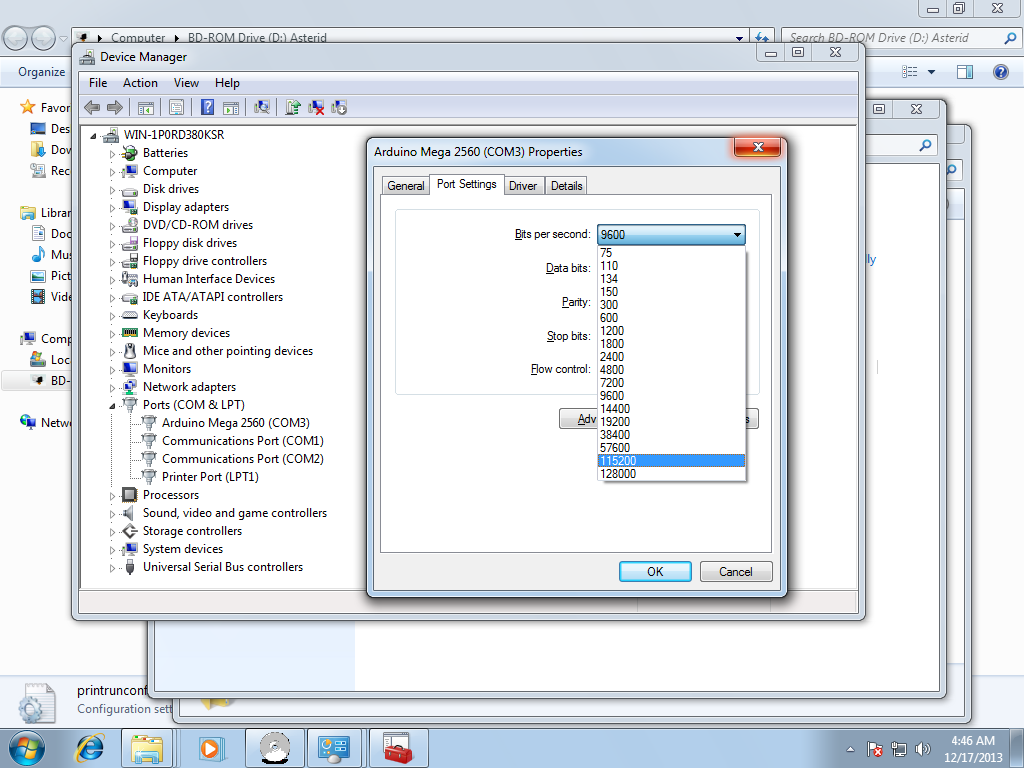
STEP 24
In the Port Settings tab change the Bits per second from 9600 to 115200.
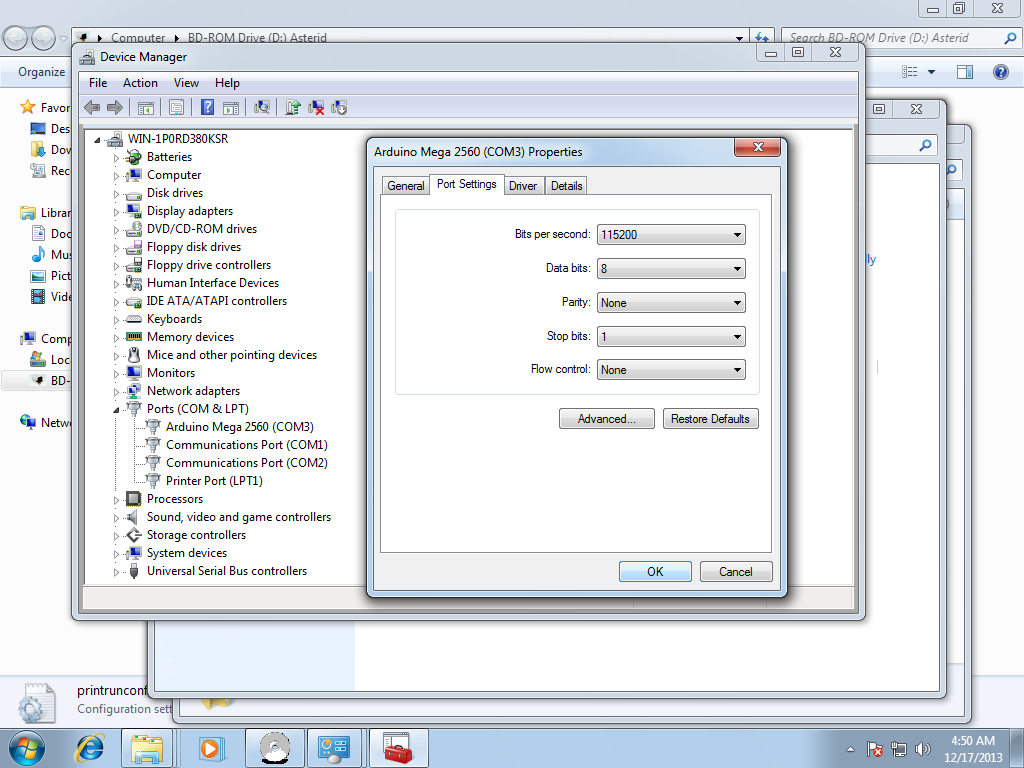
STEP 25
Verify the Bits per second is now set to 115200 and click the OK button.
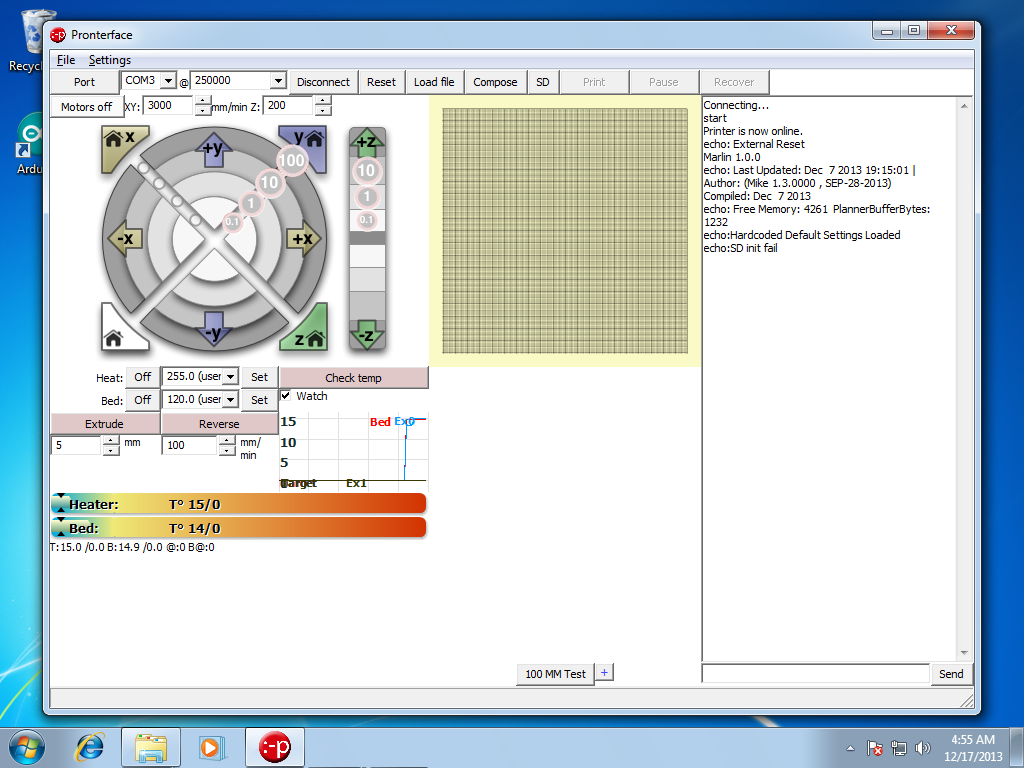
CONGRATULATIONS! Your 3D printer should be installed and working. You can now read the Getting started with Pronterface tutorial and the SLIC3R manual to prepare your 3D models for printing.
To verify that your 3D printer is installed correctly, click the start menu and open your hard drive root directory. Click the Asterid folder on your hard drive and double click pronterface to open it. Change the COM port to setting appropriate to your computer and click the connect button. After you connect, it should say, "The printer is now online" on the right hand side of Pronterface.